In today’s interconnected world, ensuring the security of our homes and workplaces has become increasingly important. A Raspberry Pi security camera – a DIY smart security camera based on the versatile single-board computer Raspberry Pi – presents a cost-effective and customizable option. I also personally think it’s a great first project for IoT hobbyists who want to start becoming familiar with the hardware and configuration of smart security devices.
I’ll start by explaining what a Raspberry Pi security camera is and why you might want to build your own. Then, I’ll walk you through the steps involved in gathering your materials, installing the operating system, configuring the camera, and securing it. If you’re already very familiar with IoT concepts and the Raspberry Pi computer, you might want to skip the next section. Otherwise, keep reading, and by the end of this blog post, you’ll have all the knowledge you need to build your smart security camera.
Introducing the Raspberry Pi security camera
Many IoT hobbyists are already very familiar with the Raspberry Pi and its maker, the Raspberry Pi Foundation. The device enables people of all ages to learn about computing and programming, and it’s small and affordable, which makes it popular. (If you aren’t yet familiar, read our guide for starting out with Raspberry Pi prototyping.)
The Raspberry Pi consists of a credit card-sized motherboard with various components, including a processor, memory, input/output ports, and an operating system. It typically runs a Linux-based operating system, such as the Raspberry Pi OS. The device has general-purpose input/output (GPIO) pins, which allow users to connect external devices like sensors, cameras, and displays. The Raspberry Pi also has several models, each offering different specifications and capabilities.
Now, why would you want to use it for a security camera? After all, the cost of the average smart security camera has gone down over the years. You can find one for $60 or less on Amazon. So why go for a DIY security camera if there are already cheap options available?
I think there are a couple reasons. A Raspberry Pi-based video security system is highly flexible and lets you tailor the camera’s features to the specific needs of your home or your company. Additionally, if you rely on a third-party security camera provider, you’ll have to hope they stay on top of vulnerabilities, patches and breaches. But there have been a lot of instances in which smart devices are less than ideally protected, resulting in serious security incidents. So I would say you’ll likely have an advantage by relying on a trusted OS that you’ve configured and adjusted for the highest level of security. Not to mention, you also have the opportunity to learn valuable skills for configuring IoT hardware and software.
Also, I should point out that the hardware for a Raspberry Pi Security Camera is quite affordable as well. But you’ll see more on that in the next section.
Understanding the hardware
The materials you’ll need to build your own Raspberry Pi security camera include:
- A Raspberry Pi computer
- A camera module
- A power supply
- A microSD card
- A case
- Miscellaneous cables and adapters
Let’s go through these one at a time. The computer supplies the processing capabilities for the video camera and will also be able to connect to the internet. Some popular Raspberry Pi models for security cameras include the Raspberry Pi 4 Model B, which may be a bit expensive at nearly $80, and the Raspberry Pi Zero W. The Zero W provides the lowest-cost option at just $30, but it’s a somewhat older model. For your reference, the Raspberry Pi 4 will have a higher energy footprint than the Zero W, but provide lower latency and higher computing power.
Next, you need a camera module that’s compatible with the Raspberry Pi computer. This component is what actually captures the video footage. Some popular options are the Raspberry Pi Camera Module V2 ($29) and the Raspberry Pi NoIR Camera Module V2 ($27), which supports infrared video as well. There’s also the Raspberry Pi High Quality Camera option, which is more expensive and will require more processing power.
Options for a power supply are too vast to go into here, and the same of course goes for an SD card, which will store the operating system and video footage for the security camera. You’ll likely want to choose a relatively high-capacity card, since video typically takes up a lot of space on the card. At the very least, it should have 8GB capacity.
Next, you’ll want to get a case for the camera. If you’re particularly ambitious, you can 3D-print your own case. Alternatively, you can look for “dummy” security cameras that will provide a professional-looking housing. These fake cameras are commonly used when a real camera is too expensive but a fake camera might be sufficient deterrent to a thief, for example. As far as cables, you’ll likely need a standard micro-USB cable and HDMI cable. With all of that, you’re finally ready to start building your Raspberry Pi security camera.
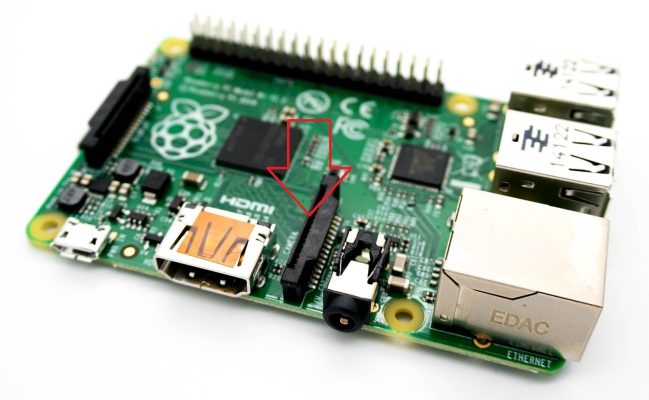
Connect the security camera to the Raspberry Pi by connecting the ribbon cable on the camera to the slot in the picture. Alternatively, if you just want to use this project to learn a bit about electronics, you can just use your computer webcam and plug it into the USB port.
Configuring your Raspberry Pi security camera
Once you’ve got all your hardware in hand, it’s time to turn to the software aspect of creating a security camera with a Raspberry Pi.
Step 1: Installing MotionEyeOS
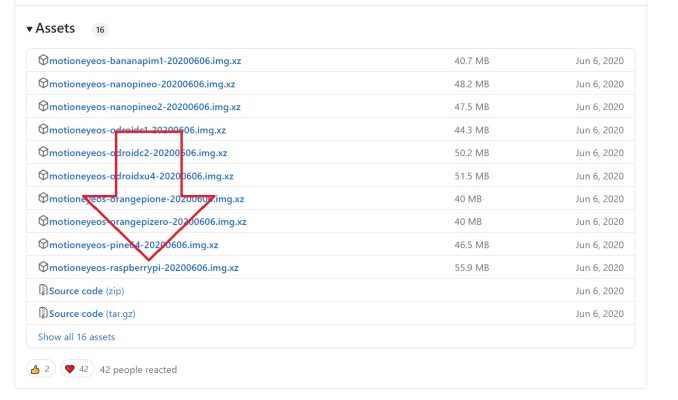
MotionEyeOS is considered among the best security camera software for the Raspberry Pi. Go to the GitHub repository here to download the software. You’ll have to scroll all the way down on the page to see the version that is specifically for your device.
Next, connect your microSD card to your desktop or laptop so you can configure it. Download the Raspberry Pi Imager and follow the instructions to finish the installation. A window will open with two options: “Choose OS” and “Choose Storage.” Click “Choose OS” and choose “Use Custom” from the menu as shown below.
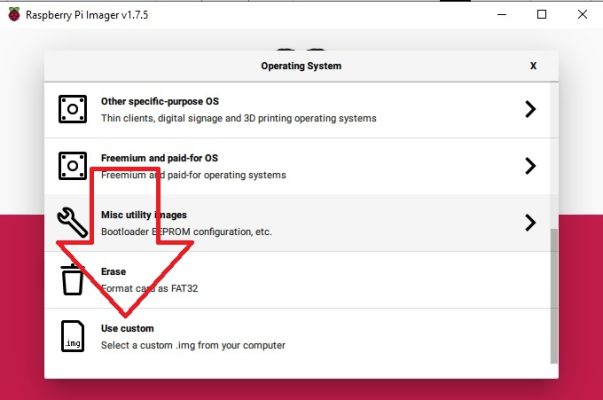
This will bring you to your download folder. Select the MotionEyeOS software download.
Now back on the “Choose Storage” and “Choose OS” page, click “Choose Storage” and pick out the microSD card you want to use. Click “Write” and wait for the process to finish. You’ll have to reinsert the microSD card at this point because it will automatically eject.
Step 2: Connecting to the internet
Connecting your Raspberry Pi to your Wi-Fi will require you to write some code, so start by downloading a free code editor like Visual Studio Code, or if you’re unfamiliar with VS Code, you may find it simpler to use a text editor like Notepad on Windows. Open a new file and paste in the following code:
country=US
update_config=1
ctrl_interface=/var/run/wpa_supplicant
network={
scan_ssid=1
ssid=“MyWiFiName”
psk=“MyWiFiPassword”
}
Replace “MyWiFiName” with the SSID, meaning the name of your Wi-Fi, and replace “MyWiFiPassword” with the information on your router. Also change the country to match the one in which your Raspberry Pi security camera will be operating. Save the file under the name “wpa_supplicant.conf” on your microSD card.
Step 3: Configuring the camera
Now eject the microSD card from the computer and insert it in the slot on the board. Power up the Raspberry Pi. You’ll need to have AngryIPScanner or a similar IP address scanning software downloaded on your desktop or laptop computer to complete this step.
Open the AngryIPScanner software and you should see multiple IP addresses for all your internet-connected devices. The one you’re looking for should have “meye” in the title. Copy the correct IP address to your clipboard and paste it into your browser. A form will pop up that asks for a username and password. The default username for a new Raspberry Pi security camera is “admin,” and there is no password yet, so type “admin” into the username field and click “login.” Now you should be able to see your camera feed right in your browser.
Step 4: Secure your Raspberry Pi security camera
Congratulations for successfully setting up your Raspberry Pi security camera. Now, let’s move on to what is perhaps the most important step, which is configuring and securing the camera’s access controls.
Back in 2021, research indicated that smart homes could undergo as many as 12,000 cybersecurity attacks in as little as a week. In 2022, attacks on smart devices rose to over 112 million in just that year, so you have to make sure to protect your new IoT security camera.
On the camera feed page, there should be a menu icon with three lines at the top left that you can click to expand all menus. Go to “General Settings” and set up a password. Home security cameras are notorious for getting hacked, so you’ll need to choose a strong password. Generally, you want 12 characters, with a mixture of letters, numbers, and symbols.
There’s also a video device menu you can use to change the resolution and frame rate for your camera. You can also name the camera, which can be useful if you’re working with a multi-camera setup. Open the “Motion Detection” menu to set up the camera to only record video if there is movement in the room. And then there’s my personal favorite feature. There’s a Motion Notifications menu that lets you turn on email notifications whenever the motion detection gets triggered.
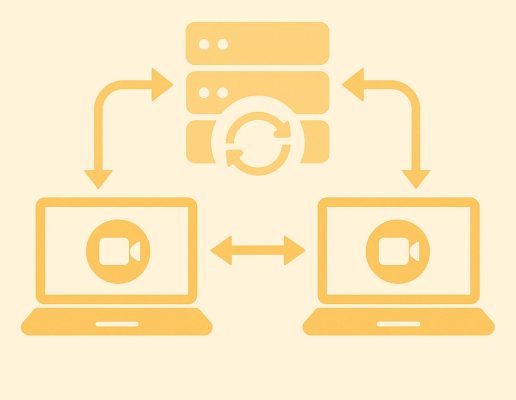
Finally, you can create a secure connection so you can view footage and control your camera directly from your smartphone. The easiest way to do this is through the Nabto Edge software. You can find the tutorial and open-source app download here. If you’ve already completed the previous steps of this tutorial, it will be very simple to add Nabto’s connectivity so you can view your footage and control your new Raspberry Pi security system from anywhere with the lowest level of latency. Also, if you’re interested in using WebRTC to stream from your camera, you can take a look at our WebRTC RPI camera demo here.
Our method will enable you to take advantage of peer-to-peer (P2P) connectivity between your smartphone and your camera for improved speed and a lower load on your network. P2P video streaming bypasses cloud processing and goes directly to your smartphone. Not only does this mean you’ll see the video faster, reducing lag, but it also means that you have increased security because P2P reduces the chance of a third party intercepting the data in the cloud. So you won’t have to worry as much about malicious actors using your new security camera as a gateway into your network to steal data or view your video feed.
Final thoughts
Hopefully you now have a clear understanding of both how to build a Raspberry Pi security camera and how important it is to prevent unauthorized access. To learn more about P2P connectivity for security feed streaming through protocols like WebRTC, contact us and request a consultation with one of our IoT experts.
Read Our Other Resources
- See how to use P2P video streaming for surveillance cameras
- Read our guide to Getting Started with Raspberry Pi Pico Programming
- Discover how to make a security camera with the ESP32 instead of the Raspberry PI