Raspberry Pi and Nabto
This guide will walk you through setting up your Raspberry Pi and a Raspberry Pi Camera Module up together with the Nabto Edge platform. We will use Edge’s TCP tunnelling features to push an RTSP stream from the RPI camera to an Android or iOS phone with virtually zero hassle.
Once your setup is complete you will be able to access the stream from any network using just your phone. We will use the RTSP demo app for iOS and Android, but building your own using our respective Swift or Java/Kotlin libraries is easy.
What you will need
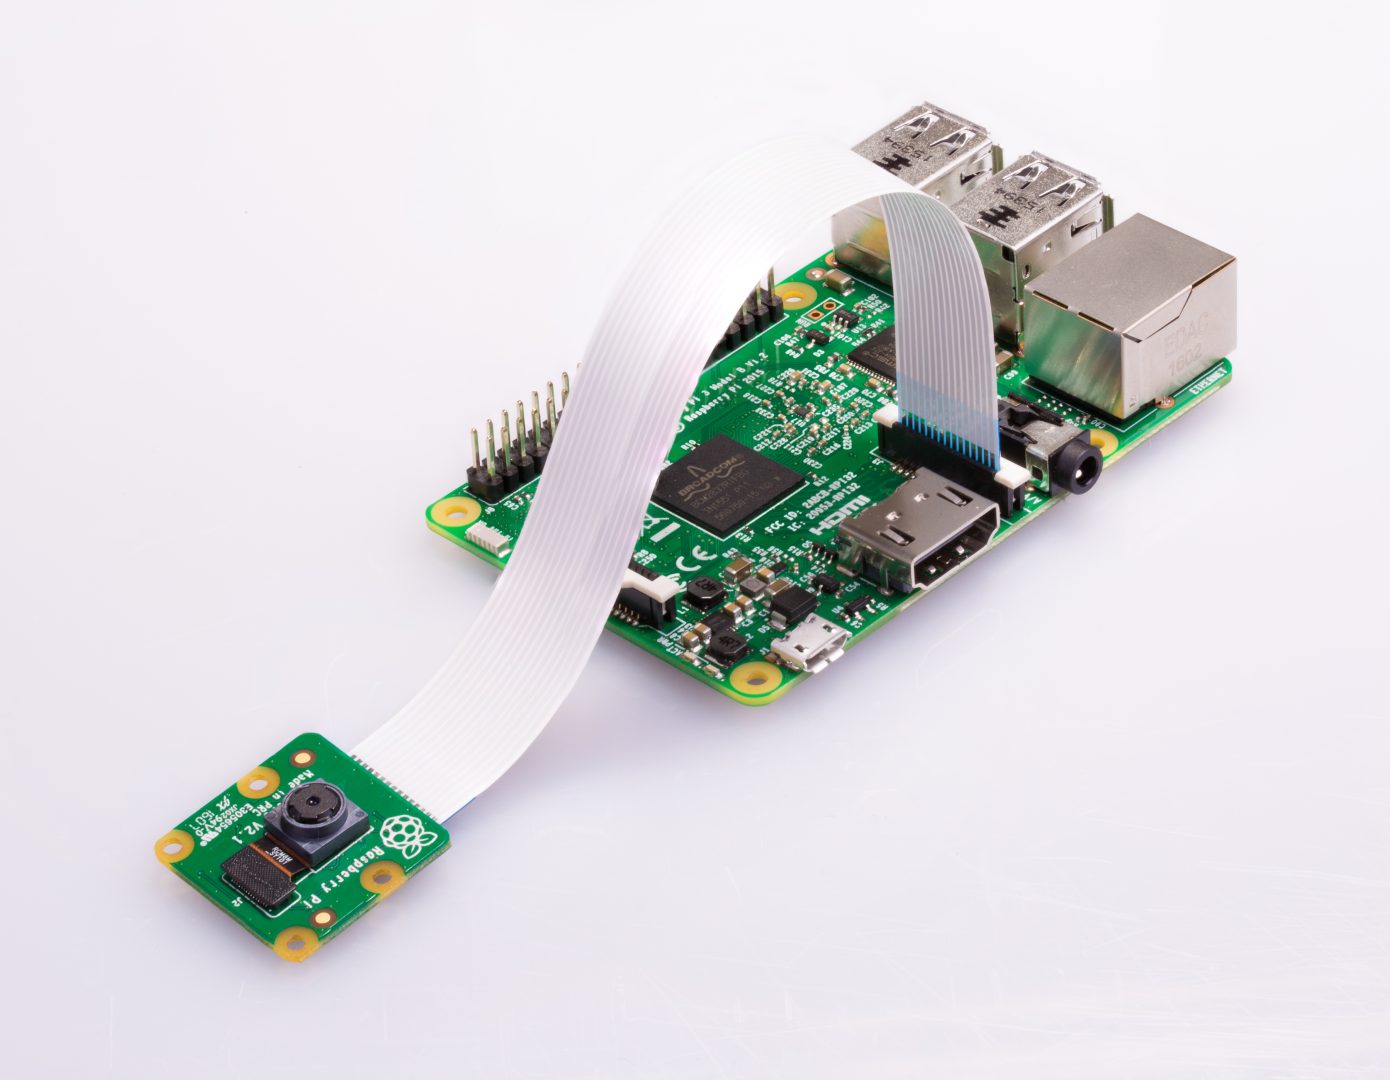
- A Raspberry Pi board. We’ve tested Raspberry Pi 4 and Raspberry Pi Zero with the standard Raspberry Pi OS, however the guide is simple enough that adapting to your specific Pi setup shouldn’t be too difficult.
- A camera. The choice of camera does not actually matter that much, as long as you can access the stream feed with a file such as
/dev/video0. In our case we used a Raspberry Pi Camera Module v1.3. You can usev4l2-ctl --list-deviceson your Pi to find your camera. - A network connection for the Pi.
Installing required binaries
First you will need shell access to your Pi. You may do this simply by connecting a keyboard and monitor to your Pi, or by using an ssh connection. Using Raspberry Pi Imager you can create an image that will already have ssh and Wi-Fi set up by editing the image configuration. Then you can flash said image to your Pi’s sd card and immediately use an ssh connection.
Once you have shell access it’s time to install the required Nabto Edge binaries. Specifically the tcp_tunnel_device executable for your CPU. You may want to inspect cat /proc/cpuinfo to see which product family your CPU belongs to. In our case we need the armv7 executable. You may find prebuilt binaries at our Nabto Embedded SDK releases page. Simply download tcp_tunnel_device for your Raspberry Pi using wget or similar.
Manual build
If you are still unsure, it may be easier to simply build the embedded sdk from scratch natively on your Raspberry Pi, this is simple to do with just a C/C++ compiler and cmake. You can build and install in the following way.
sudo apt install -y git build-essential cmake
git clone --recurse-submodules https://github.com/nabto/nabto-embedded-sdk.git
cd nabto-embedded-sdk
mkdir build && cd build
cmake -DCMAKE_BUILD_TYPE=Release ..
make && sudo make install
Now if you try to use tcp_tunnel_device --version it should print out the version of binary. It is also easy to cross-compile from a Linux host machine by specifying the CC and CXX environment variables, but this is out of scope for the guide.
Setting up the RTSP server
Nabto does not provide an RTSP server, it is up to you to find a setup that works for you. We will outline one possible setup using rtsp-simple-server. Go to their releases page and download the appropriate tarball. In our case we will be using linux_armv7. We will download this to our Pi with wget and then extract the contents.
wget https://github.com/aler9/rtsp-simple-server/releases/download/v0.20.2/rtsp-simple-server_v0.20.2_linux_armv7.tar.gz
tar xvf rtsp-simple-server_v0.20.2_linux_armv7.tar.gz
cd rtsp-simple-server
Here we have two options for setting up a camera stream. If you are using a Raspberry Pi Camera Module, then rtsp-simple-server has first class support for pushing an RTSP stream from that camera. See the rtsp-simple-server Pi Camera guide for specifics. You will have to edit rtsp-simple-server.yml that came along the rtsp-simple-server executable, this is the configuration file for rtsp-simple-server and it uses YAML. Simply open rtsp-simple-server.yml in your favorite text editor and replace everything inside the paths section with the following.
paths:
  cam:
    source: rpiCamera
Now you can start the server.
./rtsp-simple-server
And the stream can be reached at rtsp://raspberrypi:8554/cam. You can view the stream on a separate machine with
ffplay -rtsp_transport tcp rtsp://raspberrypi:8554/cam
If the URL does not work, you may want to run ip a on your Pi and see what its IP address on the local network is, and then replace raspberrypi in the URL with the aforementioned IP address.
Setup without Camera Module
Alternatively, if you do not have a Raspberry Pi Camera Module, you can still use a USB camera or similar. As with the above section, you will have to edit rtsp-simple-server.yml to have the following at the bottom.
paths:
  cam:
    runOnInit: ffmpeg -f v4l2 -i /dev/video0 -pix_fmt yuv420p -preset ultrafast -b:v 600k -f rtsp rtsp://localhost:$RTSP_PORT/$RTSP_PATH
    runOnInitRestart: yes
As you can see upon running rtsp-simple-server it will start up ffmpeg and push /dev/video0 to the rtsp url.
TCP tunnelling with Nabto
Now we can initialize the configuration of tcp_tunnel_device. We will do this using the --demo-init option. Notice that --demo-init will make a basic configuration for testing purposes, particularly the IAM configuration is not suited for production use. Consider using --init to make a configuration where you can set up IAM for your specific purposes after trying out the demo. Remember that the RTSP server you set up in the previous section must still be running.
The more in-depth Nabto Edge RTSP guides for iOS and Android describe how to do the Nabto specific configuration, ie obtain device id and provision a device in the Nabto Cloud backend with public key fingerprint. Also the RTSP guides describe how to install and use a video client app on iOS and Android.
So to begin creating the configuration, run the following command on your device.
tcp_tunnel_device --demo-init
First it will ask for your product and device ID, you can get these IDs from the Nabto Cloud Console. After this it will ask you to add some tunnel services. We will add an RTSP service. Recall that we set the port to 8554 and the endpoint to /cam, let’s set the RTSP service settings accordingly, refer to the following block.
Next step is to add TCP tunnel services.
What type of service do you want to add?
[0]: continue
[1]: ssh
[2]: http
[3]: rtsp
Enter a valid number (default: 1) [0-3]: 3
Enter the port of your RTSP server (default: 8554) [0-65535]: 8554
Enter your RTSP endpoint (default: /video): /cam
Added rtsp service on localhost port 8554 with metadata rtsp-path => /cam
The program will then ask if you want to add another service, we can exit the flow here by entering 0. It will then print out a fingerprint that you should enter into the Nabto Cloud Console. Refer to the Nabto Edge RTSP guide. Your state files will by default be saved in your home directory, for a Raspberry Pi with Linux this would be the ~/.nabto/edge/ directory. Your state files include descriptions of device and product ID, IAM setup, services, private key used to identify the device, etc.
End result
With tcp_tunnel_device and rtsp-simple-server set up, we simply need to run both of them at the same time.
rtsp-simple-server &
tcp_tunnel_device &
On your phone you can download the Edge Video app for iOS or Android and use it to pair with your Raspberry Pi. Then connect to it and view the RTSP stream - it will even work remotely after pairing! Again refer to the Nabto Edge RTSP guides for iOS and Android for specifics. You can view the video below to see the end result.
Future considerations
Now that you have set up your board with Nabto, you may want to consider doing some of these following things in the future.
Running on startup
You may want tcp_tunnel_device and rtsp-simple-server to start on boot. You could write a script called start_rtsp.sh and use crontab to make it run on startup.
Building your own app
The repository for the Android video app you used in this guide is public and can be found at https://github.com/nabto/edge-android-demos as tunnelvideo. There is also a much simpler Android app example, edge-android-simpletunnel which very concisely shows how to set up a tunnel to work with Nabto enabled devices on Android. Note that simpletunnel uses only Java, however our Android libraries also support Kotlin which is recommended over Java for Android development.
Testing on iOS
In the future we will also have an iOS app to test your setup with. It is however already possible to make your own using our Swift library.